CLI
The DevAssure Command Line Interface (CLI) extends DevAssure's capabilities, allowing you to execute automation tests directly from a command-line environment. This powerful feature enables seamless integration of your automated tests into any CI/CD pipeline configured for CLI operations.
This guide provides the essential steps to get started with the DevAssure CLI.
Requirements
- A valid DevAssure subscription.
- You have created test cases and test suites to be executed.
Download CLI
DevAssure CLI comes with a standalone installation package. Follow these steps to download and install it:
- Click on Download on our official website: DevAssure
- Select the compatible version of DevAssure CLI for your operating system and download.
- Extract the package by unzipping it and move it to your chosen directory for running automation tests.
- Additional configuration may be necessary depending on your operating system.
Generating Authentication Token
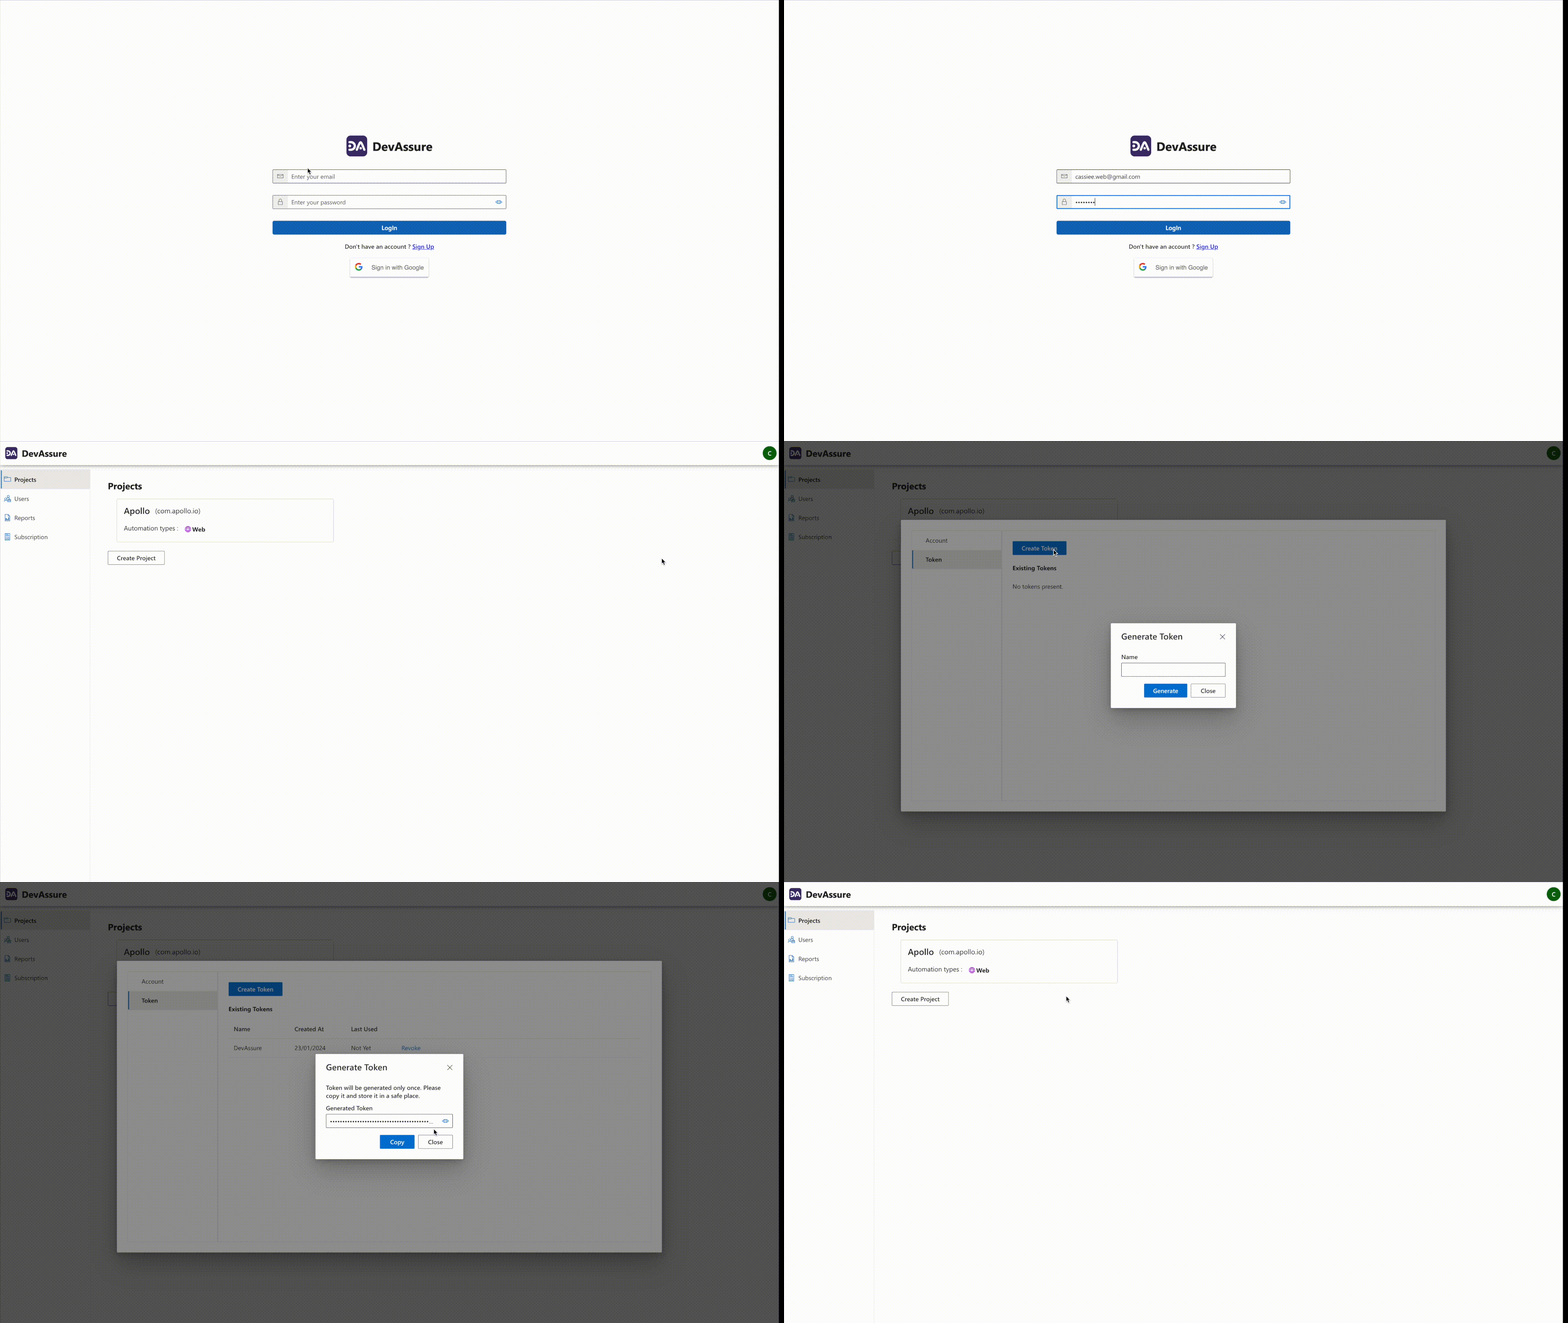
You should generate token when integrating DevAssure with external platforms (or) for execution of tests in console mode.
To generate a token, follow these steps:
- Log in to the DevAssure web portal
- Click on your user account located in the top right corner, represented by your initials.
- Navigate to Settings > Token > Create Token.
- Provide a name for the token within the Generate Token window and click on the "Generate" button.
- Copy the generated token for future use.

CLI Parameters for Web Testcase
To configure and prepare web projects for testing using the CLI, the following options are available:
| Options | Mandatory | Description |
|---|---|---|
| auth-token | Yes | Authentication token required for secure access to DevAssure. |
| source | Yes | The path to the project source in your CI environment. |
| target | Yes | A temporary folder designated for test execution. |
| run | Yes | the command used to initiate the test execution. |
| suite | Yes | Specifies the test suite that has been created for execution. |
| total-nodes | No | In a multi-node CI setup, specifies the total number of nodes available. |
| node-id | No | Identifies the current node, for instance, node zero in a two-node setup. |
| branch | No | Specifies the branch for which the tests should be executed. |
| job-name | Yes | Assigns a job name to the test execution job. |
| run-profile | Yes | Points to the run profile file that contains browser configurations |
| environment | No | Indicates the environment to run the tests in. |
Execute Web Tests via CLI
To execute tests with CLI in terminal, follow these steps:
- Open the command-line interface and navigate to the folder containing the CLI executable.
- Enter the executable command along with required arguments.
For example, executing a P0 test suite on the beta branch in the UAT environment from the CLI on macOS can be achieved with the following command:
./DA \
--auth-token DEVASSURE-TOKEN \
--source "Users/username/Documents/Demo Marvel" \
--target "/Users/username/temp/" \
run \
--suite "/Users/username/Documents/Demo Marvel/test-suite/P0.suite.tspp" \
--total-nodes 1 \
--node-id 0 \
--branch beta \
--job-name p0_tests \
--run-profile "/Users/username/Documents/Demo Marvel/run-profile/Chrome.profile.tspp" \
--environment local
DEVASSURE-TOKEN is the authentication token created in web app
